Is your computer running out of space? Is that dreaded “Low Disk Space” warning flashing at you every time you turn on your Windows 10 PC? Don’t worry! We’ve all been there. It can be frustrating, but with a few simple steps, you can free up valuable disk space and get your computer running smoothly again.
In this post, I’ll walk you through the most effective ways to free up your Windows 10 computer space. Whether you’re trying to make room for that new game, or just want to declutter your files, these steps should help you reclaim space in no time.
Why Does Windows 10 Run Low on Disk Space?
Before diving into the solutions, let’s quickly talk about why your disk might be full. Here are some common culprits:
- Temporary Files – They pile up over time, filling your hard drive with stuff you don’t need.
- Old Software – Many programs you no longer use are just sitting there, taking up space.
- System Updates – Windows updates can accumulate over time, especially if you haven’t cleaned up older files.
- Large Files – Videos, high-resolution images, and even some games can take up a lot of storage.
So, how do you fix this “Low Disk Space” issue? Let’s get into the steps!
Step 1: Use Disk Cleanup
Windows 10 has a built-in tool called Disk Cleanup that can help you get rid of unnecessary files. It’s a great starting point if you’re looking to clear some space.
Here’s how to use Disk Cleanup:
Steps for Using Disk Cleanup in Windows 10
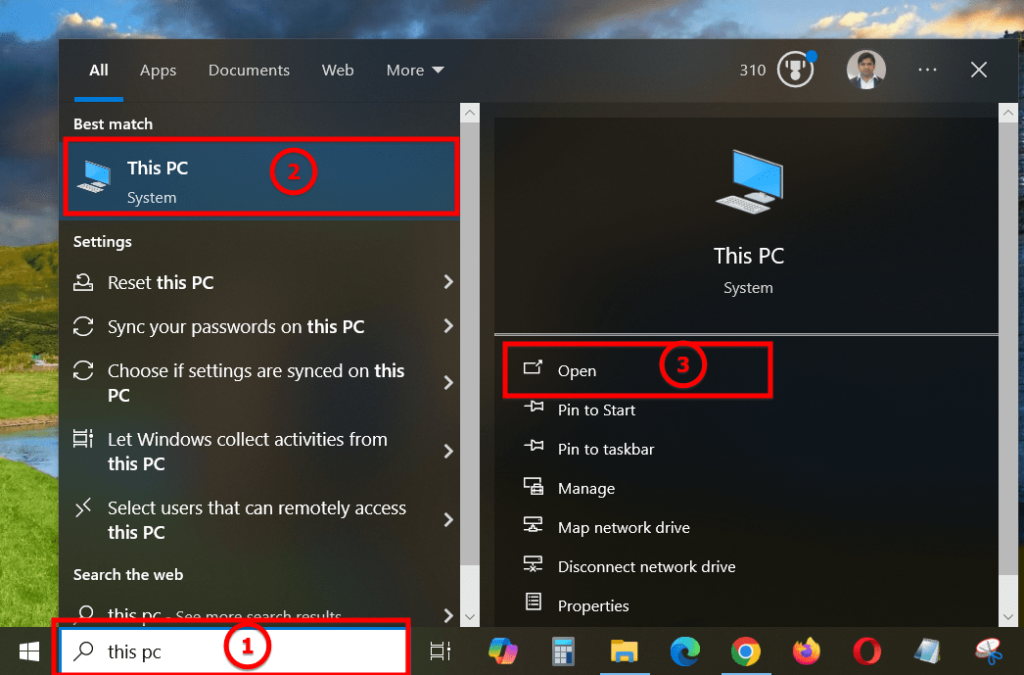
Step 1: Open Disk Cleanup
- Press the Windows Key on your keyboard and type Disk Cleanup into the search bar.
- Click on the Disk Cleanup app that appears in the search results.
Or
Search “This PC” from your desktop screen and open it.
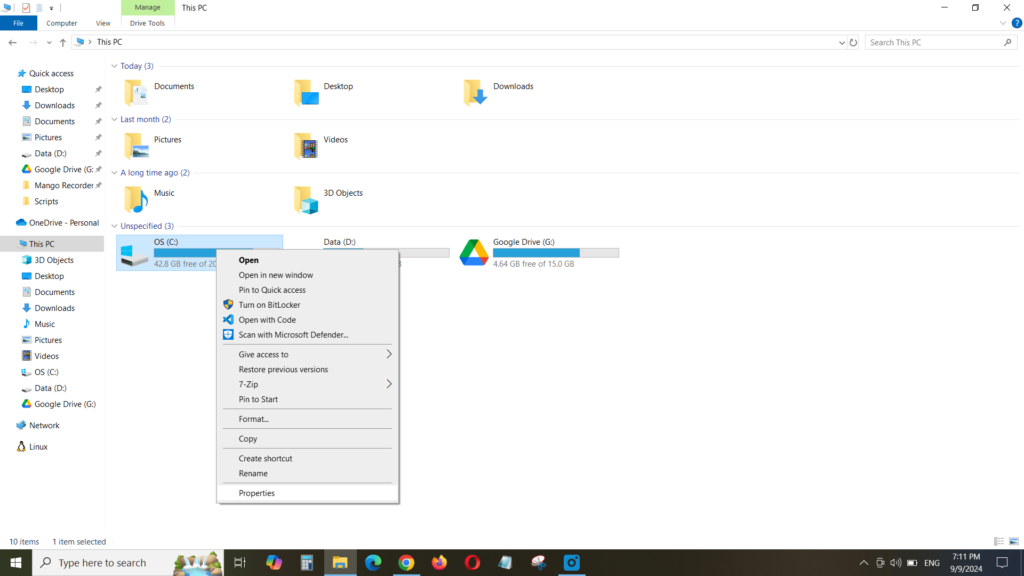
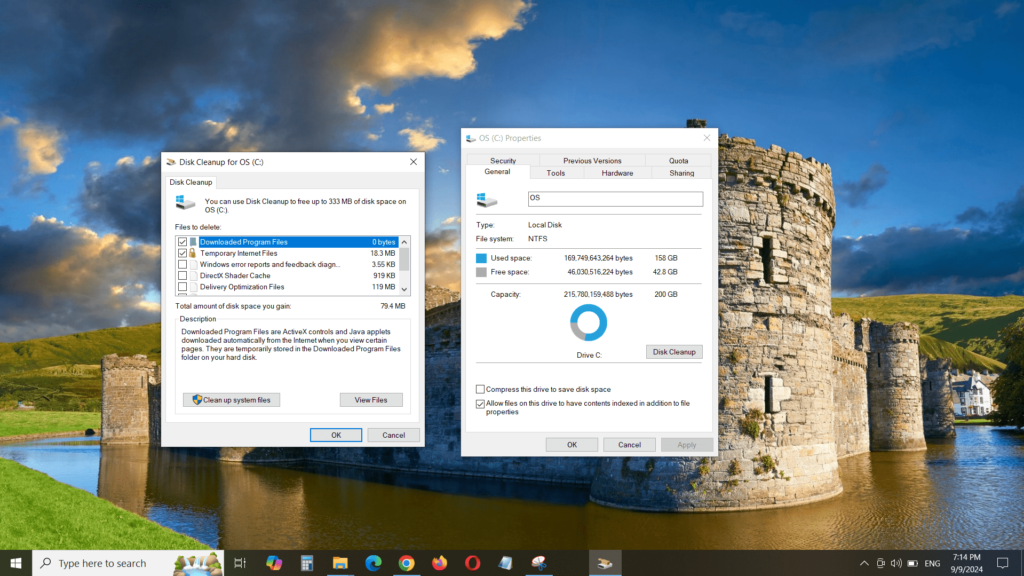
Step 2: Choose the Drive
- A small window will pop up asking you to choose the drive you want to clean up.
- Select the C: drive (or any other drive you want to clean up) from the drop-down menu.
- Click OK.
Or
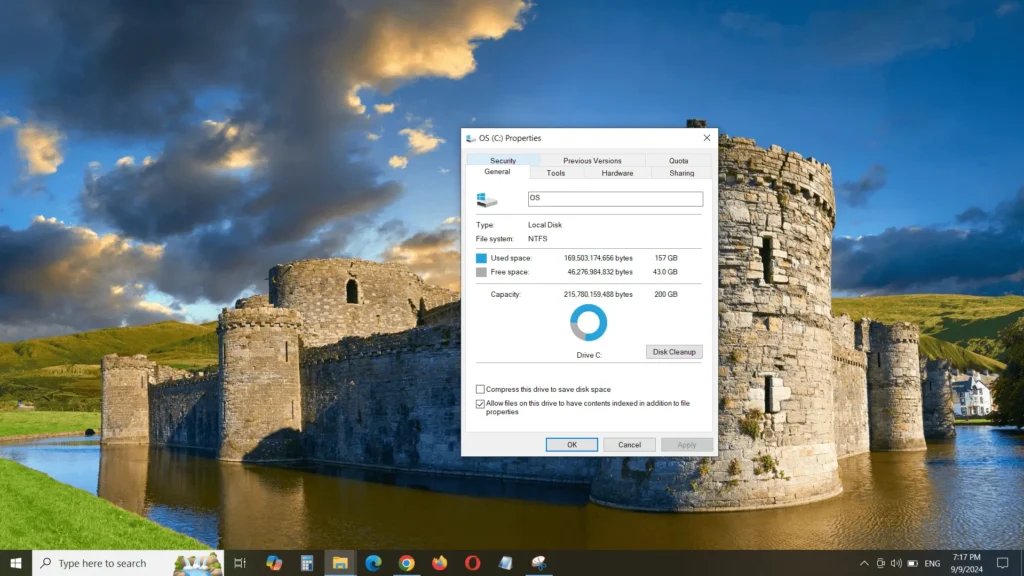
Right-click on C Drive and then Click on “Properties”
Properties of C drives
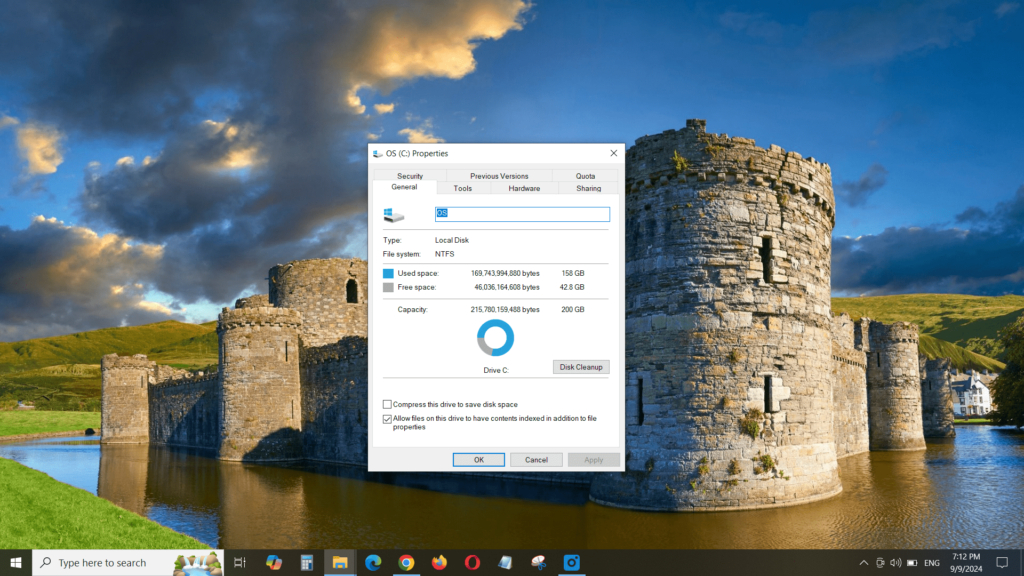
Click on the button “Disk Cleanup”
Step 3: Scanning for Files to Delete
- Disk Cleanup will now scan your drive for files that can be deleted. This may take a few moments, depending on your drive size and the number of files.
Step 4: Select Files to Delete
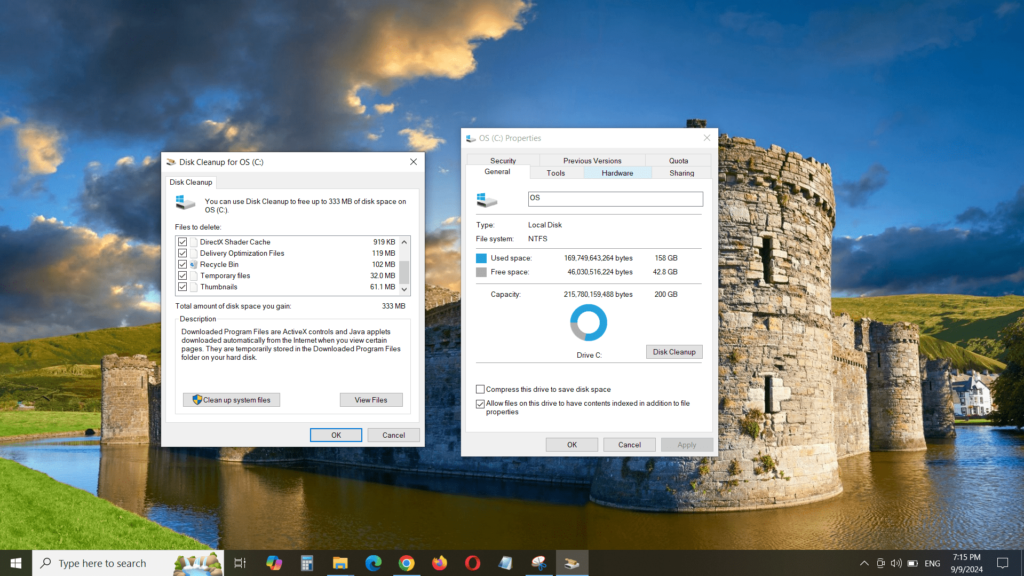
- After the scan is complete, a list of file types will appear. These are the files Disk Cleanup has found and can safely delete.
- Check the boxes next to the file types you want to remove, such as:
- Temporary files
- Recycle Bin
- Thumbnails
- System Cache
- You can also click on each file type to see a description and the amount of space it’s using.
Step 5: Clean Up System Files (Optional)
- For more advanced options, click on the Clean up system files button at the bottom of the window.
- The system will scan again, and additional file types such as Windows Update Cleanup and Previous Windows installations may appear. Deleting these can free up even more space.
- Select the additional file types you want to remove and click OK.
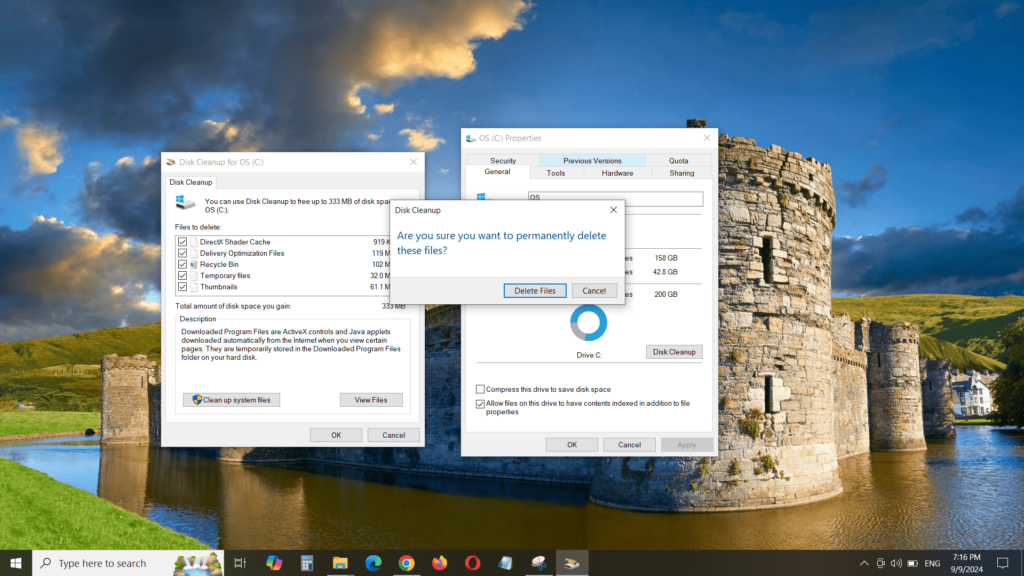
Step 6: Confirm Deletion
- Once you’ve selected all the files you want to delete, click OK.
- A prompt will appear asking if you’re sure you want to delete the selected files. Click Delete Files to confirm.
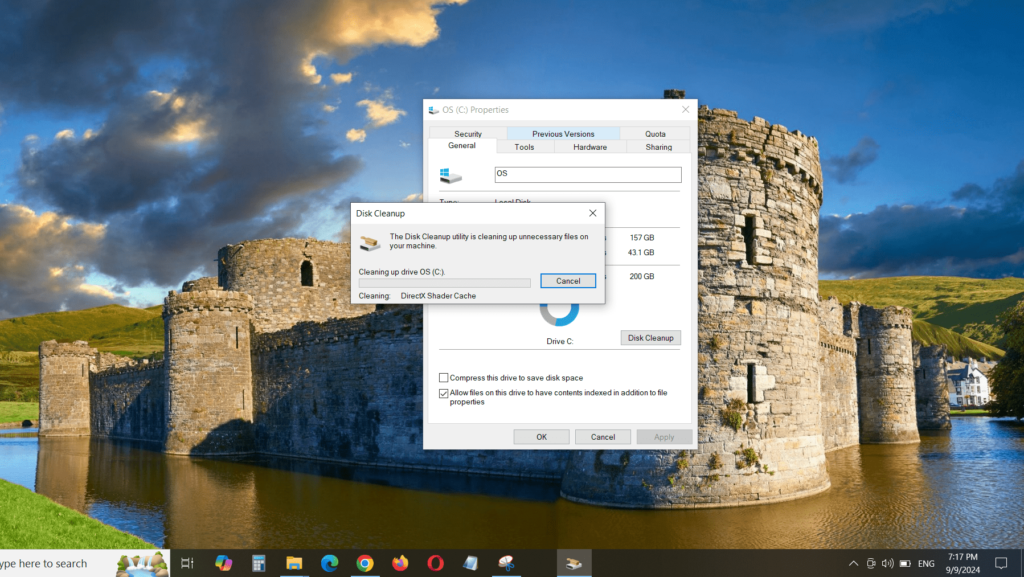
Step 7: Wait for Cleanup to Finish
- Disk Cleanup will now remove the selected files from your drive. This process can take a few minutes, depending on the size of the files.
- Once completed, the window will close automatically, and your disk should have more free space!
Bonus Tip: Automate Disk Cleanup
- If you want to run Disk Cleanup automatically, you can use Storage Sense, a feature in Windows 10 that automatically deletes temporary files and clears the recycle bin. To enable this, go to Settings > System > Storage, and toggle Storage Sense on.
This will delete files that you no longer need and can immediately free up some space!
Step 2: Uninstall Unnecessary Programs
We all have software on our PCs that we rarely use. Old games, forgotten photo editors, or that trial version of a program you downloaded a year ago and never opened again.
To uninstall these:
- Go to Settings > Apps.
- Scroll through the list of programs and click on the ones you don’t need.
- Select Uninstall and follow the instructions to remove the software.
This will instantly remove large chunks of data from your drive. If you’re not sure about a program, a quick Google search can tell you whether it’s essential or not.
Step 3: Manage Temporary and Cached Files
Temporary files can pile up quickly, and while they serve a purpose, they often stick around long after they’re useful. Here’s how to get rid of them:
- Open Settings > System > Storage.
- Click on Temporary Files.
- You’ll see a breakdown of how much space these files are using.
- Select the types of temporary files you want to delete and click Remove Files.
Step 4: Remove Large Files
Sometimes the best way to free up space is by getting rid of a few large files. Here’s how to find those space-hogging files:
- Open File Explorer and navigate to This PC.
- In the search bar, type size: and select Gigantic (>128 MB).
- This will list files that are taking up the most space on your drive.
If there are old videos, photos, or documents that you don’t need anymore, you can delete them or move them to an external drive or cloud storage.
Step 5: Use Storage Sense
Windows 10 also has a nifty tool called Storage Sense. It automatically removes temporary files, empties the recycle bin, and even deletes old downloads.
Here’s how to turn it on:
- Go to Settings > System > Storage.
- Toggle Storage Sense to On.
- You can also customize what Storage Sense deletes by clicking Configure Storage Sense or run it now.
Storage Sense works quietly in the background and helps ensure that your disk doesn’t get too full over time.
Step 6: Move Files to Cloud Storage
If you want to free up a ton of space, consider moving files to cloud storage like OneDrive or Google Drive. By doing this, you can keep your files accessible without using up physical space on your hard drive.
Here’s how you can easily move files to OneDrive (which comes with Windows 10):
- Open File Explorer.
- Drag and drop files into the OneDrive folder.
You can also use third-party cloud storage services like Google Drive or Dropbox if you prefer.
Step 7: Upgrade Your Hard Drive (Optional)
If you’ve done all the above and you’re still running out of space, it might be time to consider upgrading your hard drive or adding an external one. External hard drives are affordable and can provide you with extra storage without the need to open up your PC.
Alternatively, if you’re feeling a bit more tech-savvy, you could replace your internal hard drive with a larger one, or better yet, switch to a solid-state drive (SSD) for both more space and better performance.
Step 8: Clear System Restore Points
System Restore can be a lifesaver when things go wrong with your PC, but these restore points can also eat up valuable disk space.
To clear old restore points:
- Press Windows Key + S and type System.
- Click on System Protection.
- Select your System Drive (C:) and click Configure.
- Click Delete under the Delete All Restore Points section.
Be careful with this one. You’re removing your ability to roll back your system to an earlier state, so only do this if you really need the space!
Step 9: Disable Hibernation
Hibernation is a feature in Windows 10 that saves the state of your PC to your hard drive, so when you turn it back on, everything’s just where you left it. The downside? It can use a lot of space, especially on smaller drives.
Here’s how to disable it:
- Press Windows Key + X and select Command Prompt (Admin).
- Type powercfg -h off and hit Enter.
This will turn off hibernation and delete the associated file, freeing up a decent chunk of disk space.
Quick Recap: Steps to Fix Low Disk Space on Windows 10
| Step Number | Solution | Difficulty | Time to Complete |
|---|---|---|---|
| 1 | Disk Cleanup | Easy | 5-10 minutes |
| 2 | Uninstall Unnecessary Programs | Easy | 5-15 minutes |
| 3 | Delete Temporary & Cached Files | Easy | 5-10 minutes |
| 4 | Remove Large Files | Medium | 10-20 minutes |
| 5 | Enable Storage Sense | Easy | 5 minutes |
| 6 | Move Files to Cloud Storage | Medium | Varies |
| 7 | Upgrade Hard Drive | Advanced | A few hours |
| 8 | Clear System Restore Points | Medium | 5-10 minutes |
| 9 | Disable Hibernation | Advanced | 5 minutes |
Final Thoughts
There you have it! Following these steps should help free up space on your Windows 10 PC and make it run more smoothly. Whether you’re getting rid of temporary files, uninstalling old programs, or just moving some stuff to the cloud, every little bit helps.
So, what are you waiting for? Go ahead and clean up that disk space and say goodbye to those annoying low disk space warnings for good!
If you have any questions or run into any issues, feel free to drop a comment below. And remember, when in doubt—backup your files before making any major changes!