Solution to fix your computer slow speed is something every frustrated computer user eventually searches for — and for good reason. If your computer is running slow, daily tasks like browsing the web, editing documents, or even starting up your system can feel painfully sluggish and waste your valuable time. Whether you’re a casual user or rely on your PC for heavy workloads, poor performance can be a major headache. The good news is that you don’t always need to buy a new machine — sometimes a few smart tweaks can make a world of difference.
In this guide, you’ll discover 5 best solutions to fix your computer’s slow speed and boost its overall performance. From updating your operating system and drivers to checking for hidden malware, adjusting power settings, upgrading your RAM, or installing a fast solid-state drive — each step can help you get your computer back in shape. Let’s break down these practical solutions so you can speed up your computer and enjoy a smoother, faster experience starting today.
Table of Contents
Solutions to Fix your Computer Slow Speed
Solution 1: Update your operating system and drivers
Keeping your operating system and drivers up to date can help improve the performance of your computer. Operating system updates often include bug fixes and performance improvements, while updated drivers can improve the stability and compatibility of your hardware.
To update your operating system on a Windows computer, follow these steps:
1. Open the Start menu and type “update” into the search bar.
2. Click on the “Check for updates” option that appears in the search results.
3. In the Windows Update window, click the “Check for updates” button to begin the update process.
4. If any updates are available, follow the prompts to install them.
Read also: Creating User Profiles in Google Chrome: 5 Easy Steps
On a Mac, you can use the “Software Update” feature to check for and install operating system updates. To do this, click on the “Apple” menu in the top left corner of the screen and select “Software Update.” If any updates are available, follow the prompts to install them.
To update your drivers on a Windows or Mac computer, you will need to visit the website of the manufacturer of your hardware and download and install the latest drivers. For example, if you have an NVIDIA graphics card, you can visit the NVIDIA website to download and install the latest drivers.
It is important to keep your operating system and drivers up to date to ensure that your computer is running optimally and to take advantage of the latest features and security improvements. However, it is also important to be cautious when installing updates, as they can sometimes cause problems with your system or specific programs. If you experience any issues after installing an update, you may need to troubleshoot the problem or revert to a previous version.
Solution 2: Check for malware
To check for malware on a Windows computer, you can use a reliable antivirus program, such as Microsoft Defender or Norton. These programs will scan your computer for malware and alert you if any is found. Here are the steps to follow:
1. Install an antivirus program: If you do not already have an antivirus program installed on your computer, you will need to download and install one. There are many antivirus programs available, both free and paid. Choose a program that is reputable and has good reviews.
2. Run a malware scan: Once you have an antivirus program installed, open it and run a malware scan. This will typically involve clicking a “Scan” or “Check for malware” button within the antivirus program. The scan may take a while to complete, depending on the size of your hard drive and the number of files it contains.
3. Review the scan results: After the scan is complete, the antivirus program will display a list of any malware that was found. Review the list and follow the prompts to remove the malware. This may involve quarantining the malware, deleting it, or cleaning the infected files.
4. Keep your antivirus program up to date: It is important to keep your antivirus program up to date to ensure that it can detect the latest threats. Most antivirus programs will automatically check for updates and install them, but you can also check for updates manually by going to the “Help” or “About” menu within the antivirus program.
On a Mac, you can use the built-in “Malwarebytes” utility to scan for malware. To do this, go to the “Applications” folder and open the “Utilities” folder, then double-click on the “Malwarebytes” icon. In the Malwarebytes window, click the “Scan” button to begin the scan. If any malware is found, follow the prompts to remove it.
By regularly scanning for malware and keeping your antivirus program up to date, you can help protect your computer from malware and keep it running smoothly.
Solution 3: Adjust power settings
To adjust the power settings on a Windows computer, follow these steps:
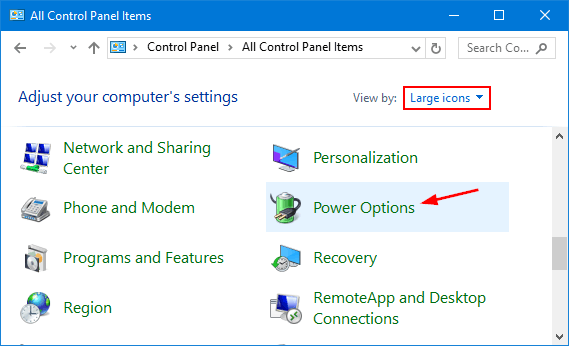
1. Click on the Start menu and type “power options” into the search bar.
2. Click on the “Power Options” option that appears in the search results.
3. In the Power Options window, click on the “Choose a power plan” link.
4. Select the power plan that you want to use from the list of options. The “Balanced” plan is a good choice for most users, as it strikes a balance between performance and energy efficiency.
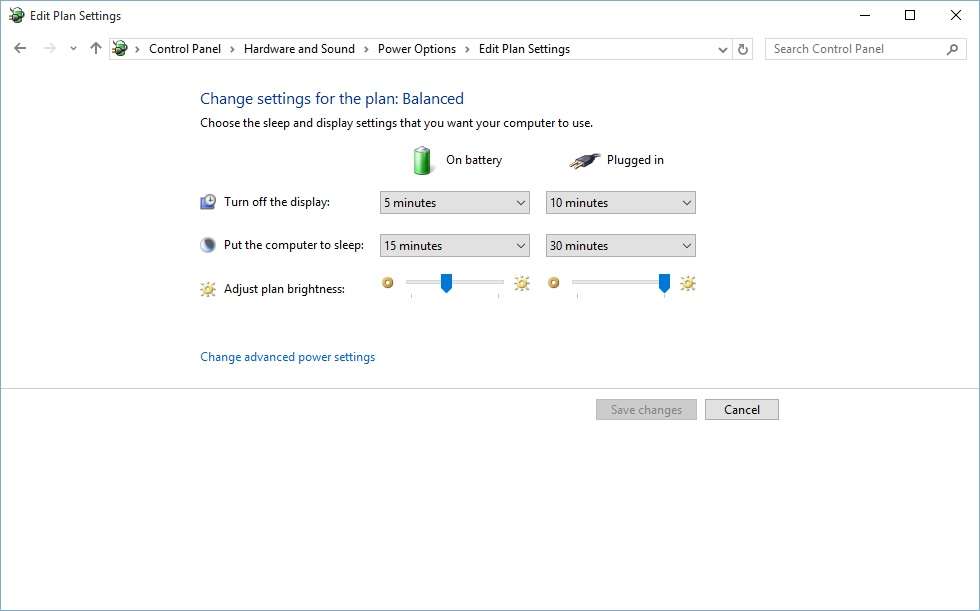
5. If you want to further customize the power settings, click on the “Change plan settings” link next to the selected power plan.
6. In the Edit Plan Settings window, you can adjust the following settings:
• “Turn off the display” and “Put the computer to sleep”: These options control how long the display and computer remain active when you are not using them. You can adjust these settings to a shorter or longer time to save energy or improve performance.
• “Hard disk”: This option controls how long the hard drive remains active when you are not using it. You can adjust this setting to a shorter or longer time to save energy or improve performance.
7. Click the “Save changes” button to apply your changes.
By adjusting the power settings on your computer, you can save energy or improve performance depending on your needs. Remember to choose a power plan that strikes a balance between performance and energy efficiency to get the best of both worlds.
Solution 4: Add more RAM to Computer
To add more RAM (random access memory) to a computer, you will need to follow these steps:
1. Determine the type of RAM your computer uses: Different computers use different types of RAM, such as DDR3, DDR4, or DDR5. You will need to purchase RAM that is compatible with your computer’s motherboard and processor. You can determine the type of RAM your computer uses by consulting the documentation for your computer or by checking the specifications online.
2. Purchase the RAM: Once you know the type of RAM your computer uses, you can purchase additional RAM from a computer store or online retailer. You will need to purchase the same type of RAM that is already installed in your computer, as mixing different types of RAM can cause problems.

3. Shut down your computer: Before installing the RAM, you will need to shut down your computer and unplug it to prevent any accidents.
4. Remove the computer’s case: Depending on the design of your computer, you may need to remove the case to access the RAM slots. Consult the documentation for your computer or search online for instructions on how to remove the case.
5. Locate the RAM slots: Once the case is removed, you should be able to see the RAM slots on the motherboard. There may be one or more RAM slots, depending on the design of your computer.
6. Install the RAM: To install the RAM, gently push the RAM sticks into the RAM slots until they are fully seated. Make sure that the RAM sticks are oriented correctly and that the notches on the RAM sticks align with the grooves in the RAM slots.
7. Replace the case: Once the RAM is installed, replace the case and reattach any cables or components that you removed.
8. Boot up your computer: Once the case is replaced and all the cables are reattached, plug in your computer and turn it on. Your computer should now have additional RAM available.
Does adding more RAM to your computer make it faster?
Does adding more RAM to your computer make it faster? Absolutely — adding more RAM can significantly boost your computer’s performance, especially if you often multitask or run memory-hungry applications like video editing software, virtual machines, or modern web browsers with many tabs open. When your system runs out of available RAM, it starts using slower virtual memory on your hard drive or SSD, which can drastically slow things down. By increasing the amount of RAM, your computer can handle more tasks simultaneously without relying on slower storage, resulting in smoother performance, quicker application launches, and an overall faster and more responsive experience.
It is important to be careful when installing RAM, as mishandling the RAM sticks or installing them incorrectly can cause problems with your computer. If you are unsure how to install RAM, it is best to consult a computer technician or refer to the documentation for your computer.
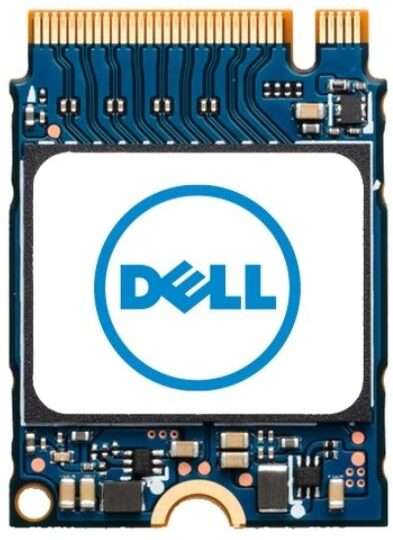
Solution 5: Use a solid-state drive (SSD)
To add an SSD (solid-state drive) to a computer, you will need to follow these steps:
1. Determine the type of SSD your computer uses: Different computers use different types of SSDs, such as SATA, M.2, or NVMe. You will need to purchase an SSD that is compatible with your computer’s motherboard and processor. You can determine the type of SSD your computer uses by consulting the documentation for your computer or by checking the specifications online.
2. Purchase the SSD: Once you know the type of SSD your computer uses, you can purchase an SSD from a computer store or online retailer.
3. Shut down your computer: Before installing the SSD, you will need to shut down your computer and unplug it to prevent any accidents.
4. Remove the computer’s case: Depending on the design of your computer, you may need to remove the case to access the SSD slot. Consult the documentation for your computer or search online for instructions on how to remove the case.
5. Locate the SSD slot: Once the case is removed, you should be able to see the SSD slot on the motherboard. There may be one or more SSD slots, depending on the design of your computer.
6. Install the SSD: To install the SSD, gently insert the SSD into the SSD slot until it is fully seated. Make sure that the SSD is oriented correctly and that the connectors on the SSD align with the connectors in the SSD slot.
7. Replace the case: Once the SSD is installed, replace the case and reattach any cables or components that you removed.
8. Boot up your computer: Once the case is replaced and all the cables are reattached, plug in your computer and turn it on. Your computer should now have an SSD available for use.
It is important to be careful when installing an SSD, as mishandling the SSD or installing it can loss of important data and money also.


Conclusion
In this article, we have looked into the 5 best solutions to fix your computer’s slow speed. If none of the above steps improve your laptop performance, it is possible that there may be a hardware issue causing the slow performance. In this case, it may be necessary to have a technician diagnose and fix the issue.

Israr Ahmed is a technology educator and creator behind the YouTube channel “Israr Ahmed Technical,” where he shares practical IT, networking, cybersecurity, and software tutorials. He also runs DriveInTech.com and PakAider.pk to help learners and professionals grow in the digital world.